How to Commission an Illustrated Map: A Guide to Bespoke Map Illustration
Illustrated maps can bring locations, spaces and even imaginary worlds to life. They take something informative, useful and practical and make it beautiful, vivid and memorable. Whether for a university campus, heritage site, visitor attraction or simply to celebrate a much-loved place, an illustrated map is a wonderfully versatile format. They can be used across all sorts of media, from printed maps and invitations to one of my personal favourites, map murals!
What I love most about creating illustrated maps is the opportunity to be playful, adding little details, character and charm that showcase what makes a place special. Beyond helping people find their way, a bespoke illustrated map can capture the personality of a town, campus or city. Maps can also bring history to life, helping people discover stories about places as they were, or as they might have been.
Of course, you could simply share a Google Maps link or print an OS map, but where's the fun in that? With illustration, we can play with the format, adding people, animals, greenery, buildings and colours that capture the character of a place. I've never illustrated a map and not immediately wanted to travel there myself!
If you're thinking about commissioning an illustrated map for your organisation, business or project, here's my guide to getting started.
1. What can an illustrated map be used for?
Illustrated maps are incredibly versatile! They can help visitors find their way around a university campus, guide families along a heritage trail or bring a place to life through information boards and printed leaflets. They can even be painted directly onto walls or installed as large-scale map murals, allowing people to feel almost as though they're part of the map themselves.
I've created illustrated maps for invitations that celebrate a special place, and worked with researchers to explore history through maps.
One of these projects involved mapping the stories of historical radicals around Russell Square in London. Working with a researcher and historical maps of the area, we were able to shine a light on some of Russell Square's unsung heroes, placing people and their stories back into the locations they were connected to.
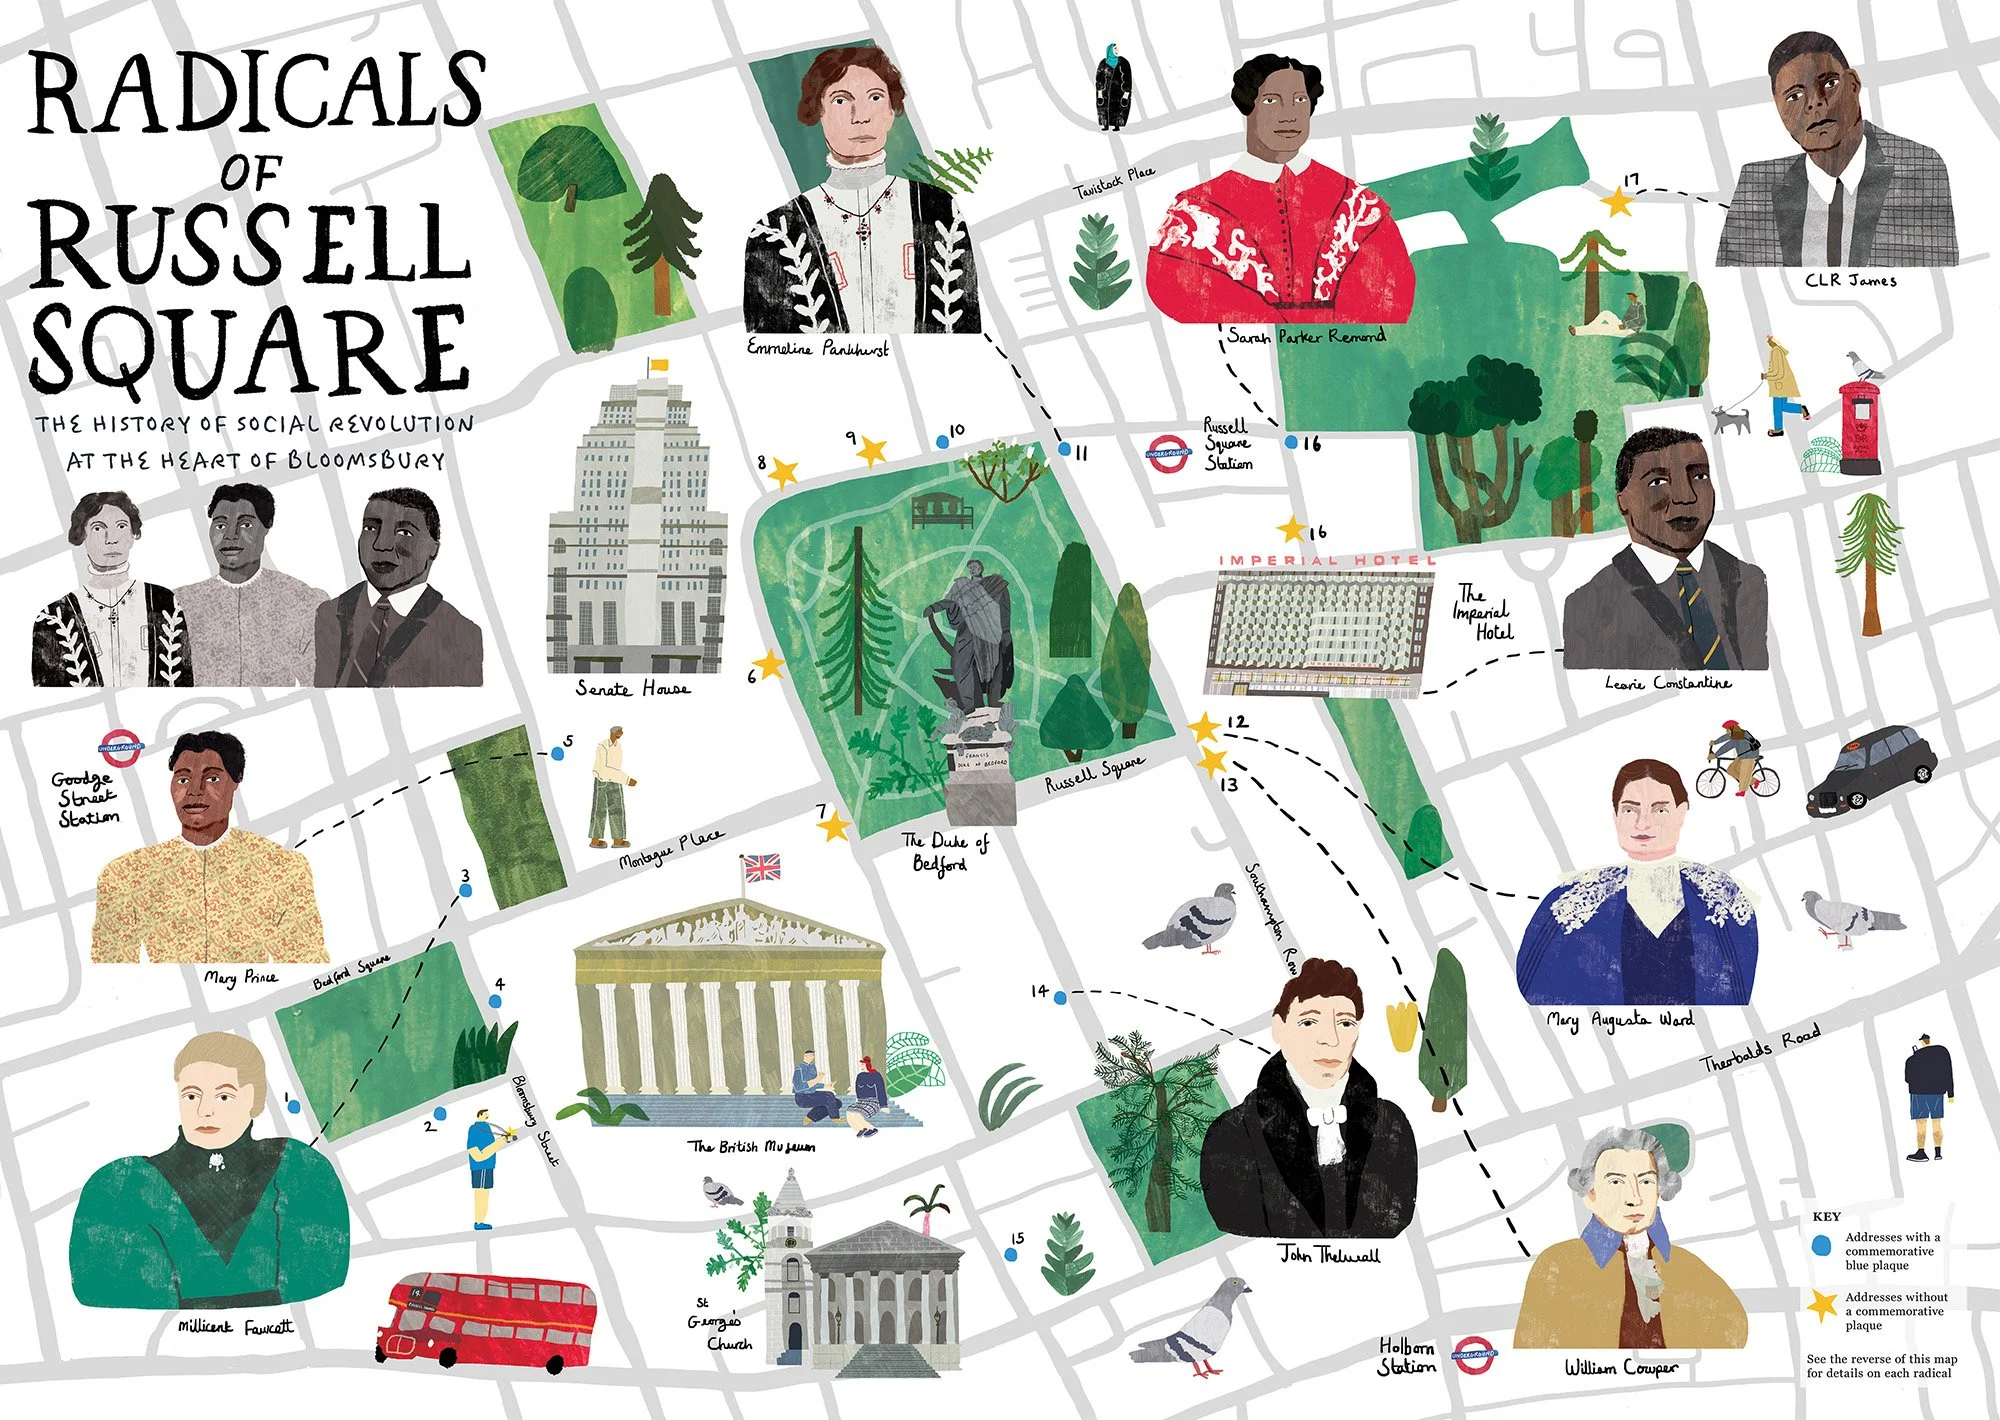
For museums, universities, heritage organisations and businesses, a bespoke illustrated map can do much more than help people navigate. It can tell stories, celebrate local identity, encourage visitors to explore and communicate what makes a place special.
One illustration can also work across several formats, from a visitor guide or exhibition display to a mural or printed souvenir.
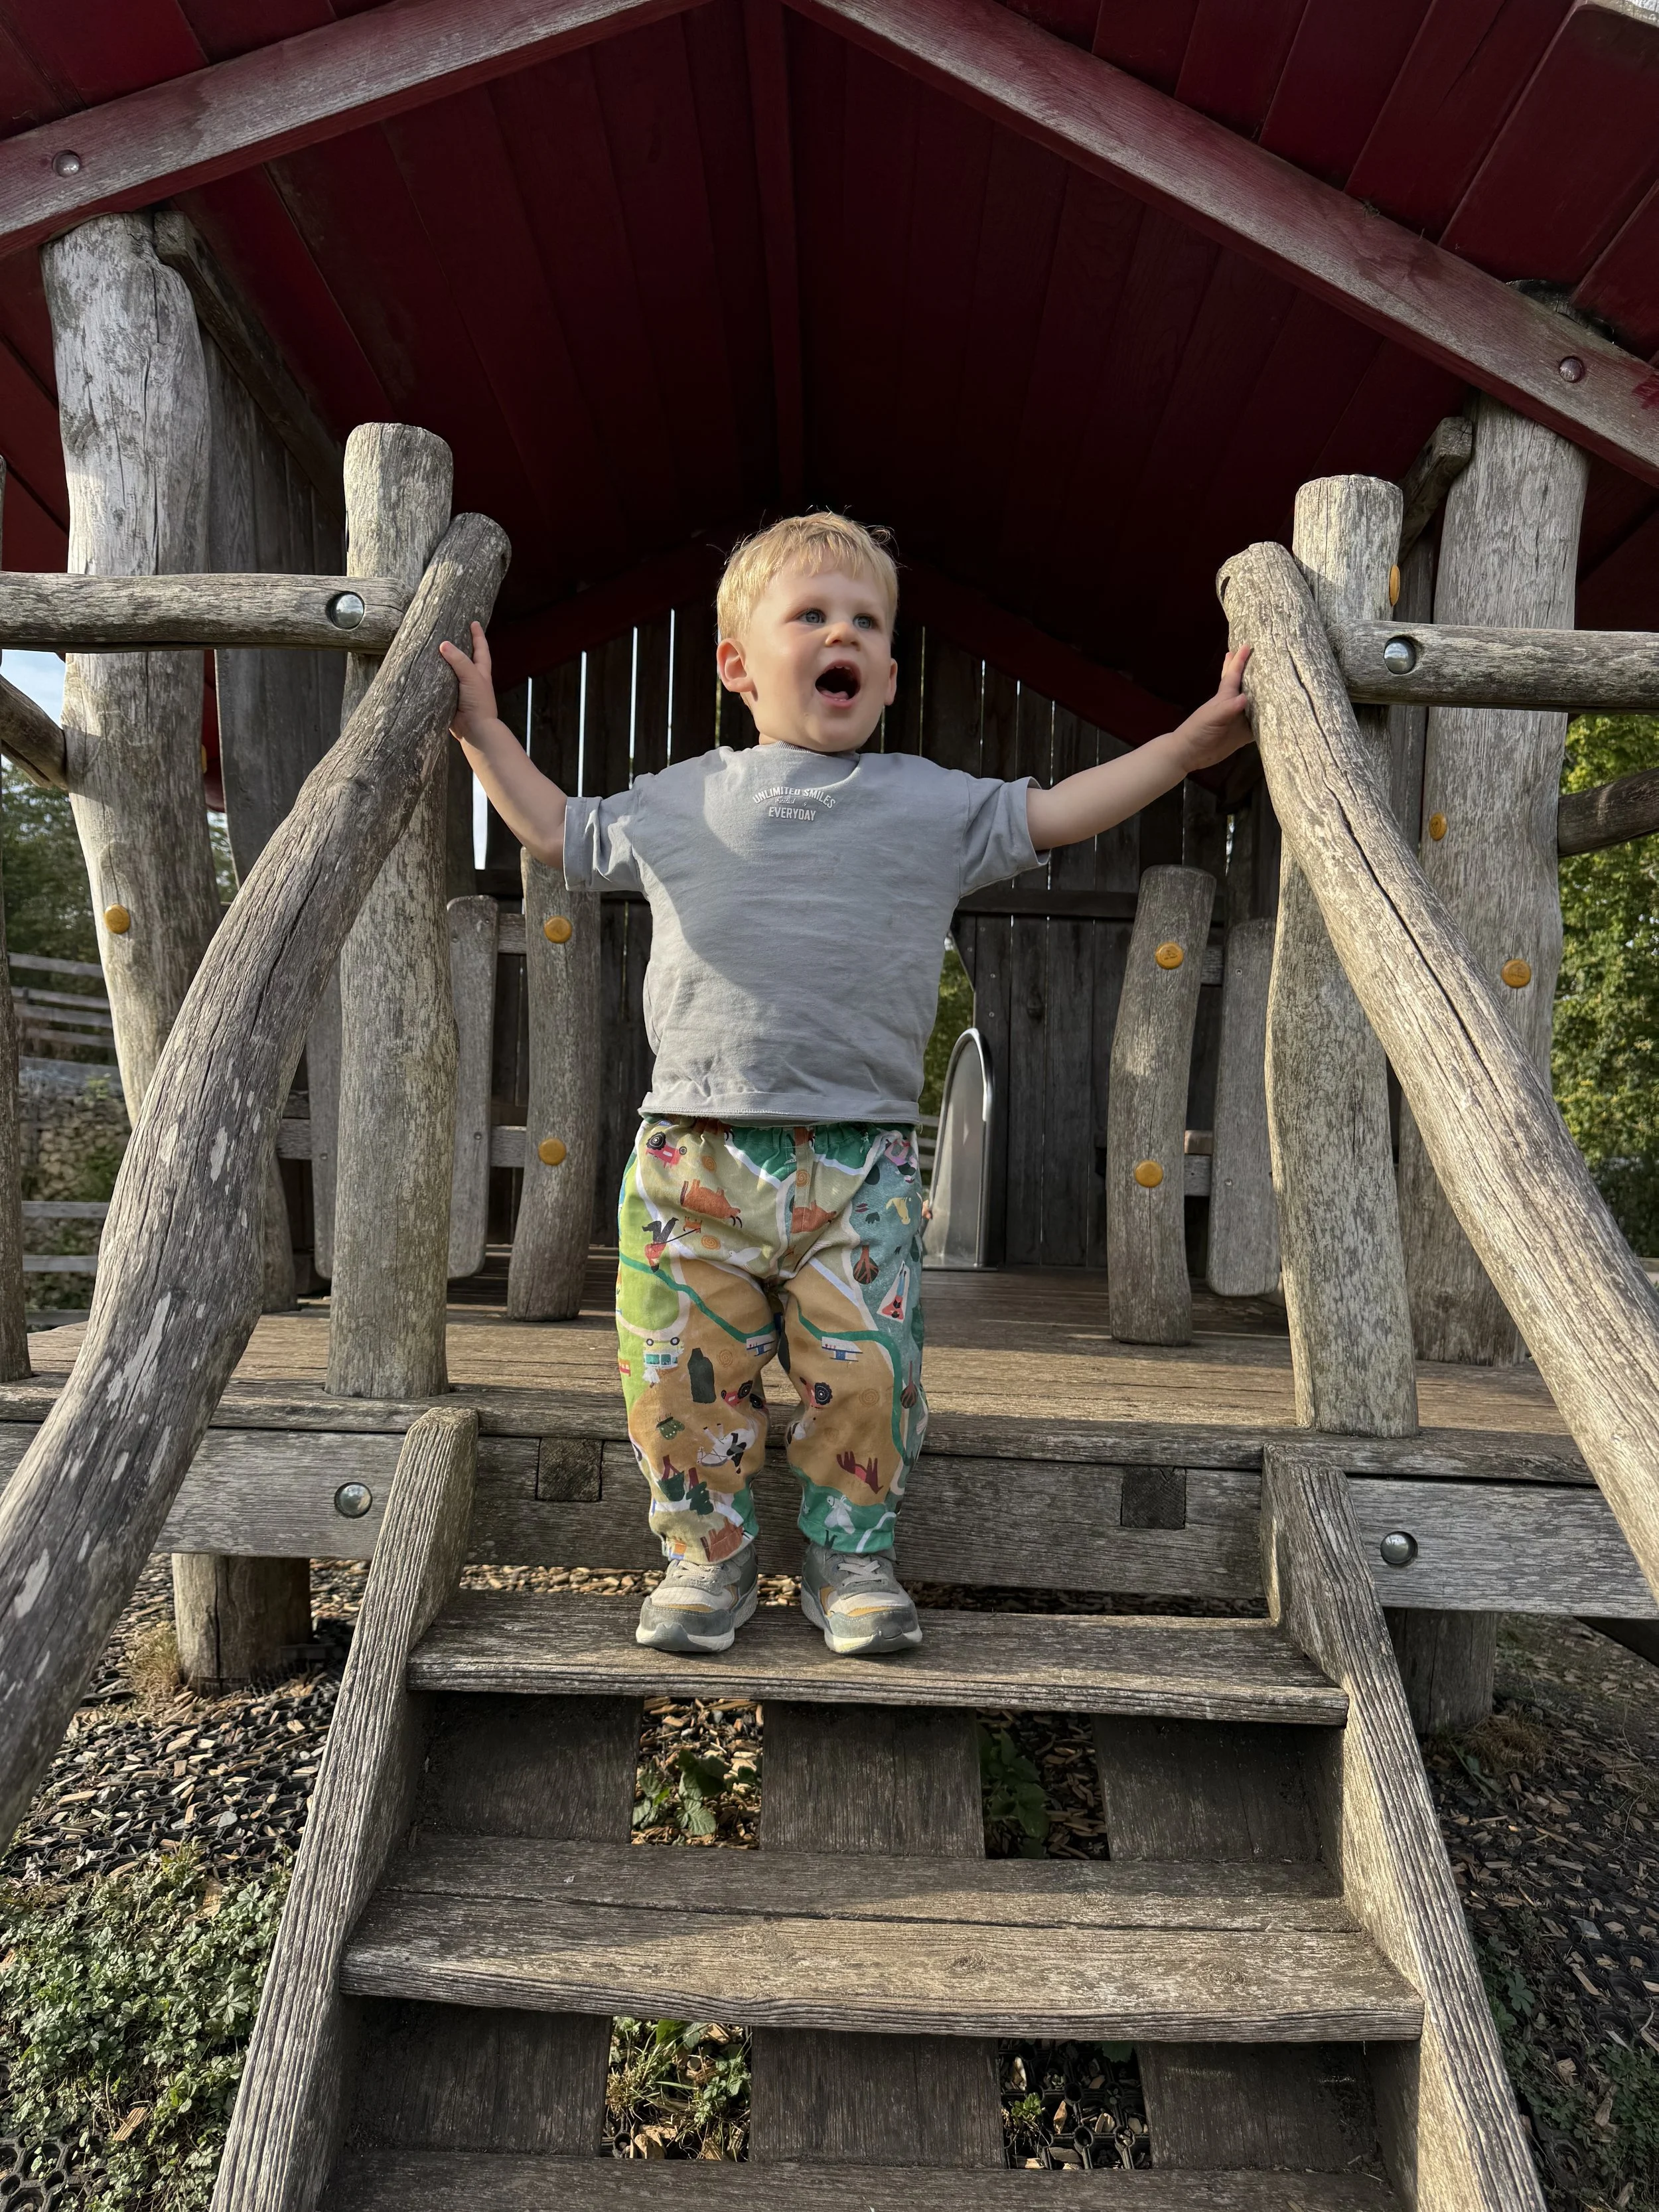
And then there are the more unexpected uses! Illustrated maps can be printed onto notebooks, tote bags, greetings cards and mugs. I've even turned one of my maps into a repeat pattern for a pair of children's trousers.
Honestly, I don't think I'll ever get bored of maps!
2. Decide which area your illustrated map will cover
When commissioning a bespoke illustrated map, one of the first things to consider is the area you'd like to include. I want to make sure your map features all the wonderful locations you have in mind, so here are a few tips to help get started.
Firstly, consider the size and orientation of your finished map. It's really helpful if you can send me a screenshot or Google Maps link showing the area you'd like illustrated. I'll use this to start planning the layout and, for larger towns or cities, I can create a Google Map with pinned locations to help us visualise where everything will sit.
I always describe my illustrated maps as geographically accurate, but not necessarily to scale.
This means I sometimes use a little artistic licence to give certain areas more room to breathe. For example, when creating my illustrated map of Coventry, I enlarged parts of the city centre because there were just so many wonderful buildings and landmarks to squeeze in!
Sometimes I'll also adjust the orientation of a map, particularly if the locations are spread horizontally but the finished illustration needs to be portrait, or vice versa. Any changes like this would always be discussed with you first.
If you've got a lovely long list of locations and they won't all fit, don't worry! We can work together to identify the non-negotiables and the secondary locations. Some might be illustrated in detail, while others could be marked with a star or included in a key.
Sometimes less really is more. A map packed with buildings can become quite busy, so choosing a variety of landmarks that complement one another can help create something that's both useful and enjoyable to explore.
It's also worth thinking about how the map will be used. If it's primarily for wayfinding, keeping routes clear and showing the correct relationships between locations is especially important. If it's more about celebrating a place or telling its story, we can afford to be a little more playful with the layout.
3. Choose the landmarks, stories and details that matter
One of my favourite parts of creating an illustrated map is deciding which buildings, landmarks and little details to include.
If you already have a list of places you'd like to feature, I'd love to see it! I'll plot them onto a map using Google My Maps or my iPad so we can start to see how everything fits together.
If you're not quite sure what to include, that's fine too. I'm happy to help research and suggest locations with your input.
Sometimes it's lovely to feature lesser-known places alongside the more recognisable landmarks. For example, I recently included a floating bookshop on my illustrated map of Leeds because it was such a unique feature of the city.
And don't worry if your reference material isn't particularly organised. Photographs, screenshots, historical maps or even scrawled notes on napkins are all welcome! I love researching places and discovering their history before diving into drawing.
For me, a successful illustrated map is about capturing the personality of a place, not just its buildings.
I love adding characters, animals, greenery and little references to local identity.
In Leamington Spa, for example, there's a wonderful connection to circus history through Victorian elephant trainer Sam Lockhart, whose performing elephants were known as The Three Graces. Local legend has it that his elephants were walked through town to bathe in the River Leam. Of course, I had to include an elephant on my illustrated map!
Similarly, my illustrated map of Leeds features little golden owls, a nod to a local symbol that many Leeds residents will recognise. These are the sorts of details that make maps fun to explore, especially when you spot something familiar or discover something you didn't know before.
Perhaps your town has an unusual tradition, a local legend or a fascinating piece of forgotten history? These little stories can make brilliant additions to a bespoke illustrated map, giving people something new to discover.
4. Think about who will use your illustrated map
When commissioning an illustrated map, it's worth thinking about who will be using it and what you'd like them to get from the experience. A university campus map, a children's heritage trail and a historical research map might all look quite different.
For students navigating a campus or visitors following a trail, the map needs to be engaging and visually detailed while remaining accurate and informative.
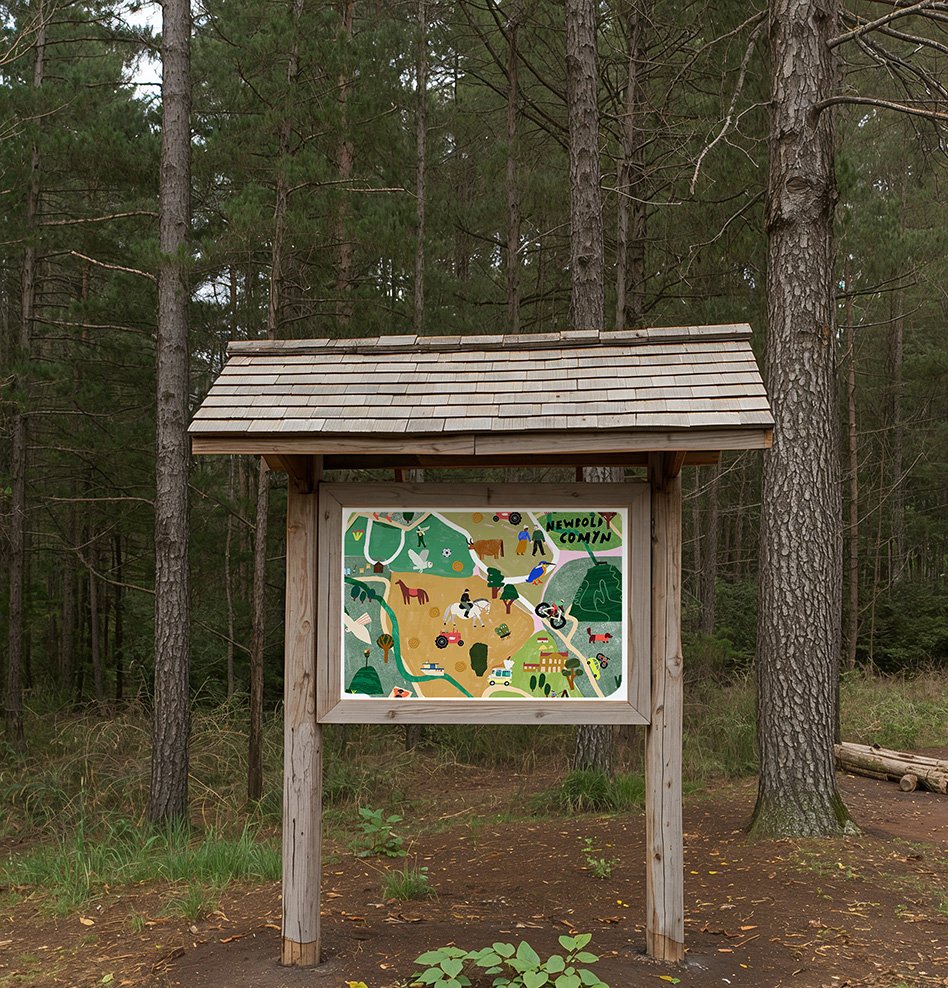
I aim to create maps that are both beautiful and practical, incorporating recognisable landmarks, road names and clear pathways, with particular emphasis on main roads and important routes. After all, we want people to enjoy using the map without getting lost!
The final format also makes a difference. For smaller printed maps and leaflets, we might use a key or print additional information on the reverse to avoid overcrowding the illustration.
For a circular walking trail, the map might act as a supporting guide, with little activities or interesting facts to discover along the way. Larger formats, such as illustrated map murals, offer more room for extra details, although I still believe it's important not to overload the design.
For maps aimed at children and families, there's an opportunity to be a little more playful. We can include characters, animals and details to spot along the way, encouraging children to look more closely at their surroundings.
It's also important to think about what information is appropriate and how much text is really needed.
For example, when adapting one of my maps into a pattern for children's clothing, I removed the road names and labels, which weren't necessary for a decorative design, and even took a beer illustration off the top of a pub!
It's a small example of how considering the audience can influence the final artwork.
5. How does the illustrated map design process work?
Every illustrated map starts with a conversation!
Ideally, I'd love to sit down over a coffee, grab a pen and paper (or my iPad) and have a doodle together. It's a lovely way to start visualising your ideas and exploring what the map could become.
If meeting in person isn't possible, a Zoom call works just as well. We'll chat about your project, what you'd like the map to achieve, who will be using it and where it will eventually be displayed.
We'll also discuss your budget, timescales and whether the finished illustration will be used for print, digital media or both. I'll then put together a quote for your project.
Once we're ready to get started, I'll begin researching the area, gathering reference images and plotting the key locations.
From there, I'll create a rough layout to establish the shape of the map, the main roads and pathways, and where the illustrated landmarks will sit. This gives us a chance to make changes to the composition before I start adding all the lovely details.
I create my illustrated maps digitally on my iPad, often incorporating handmade textures to give them a more tactile feel.
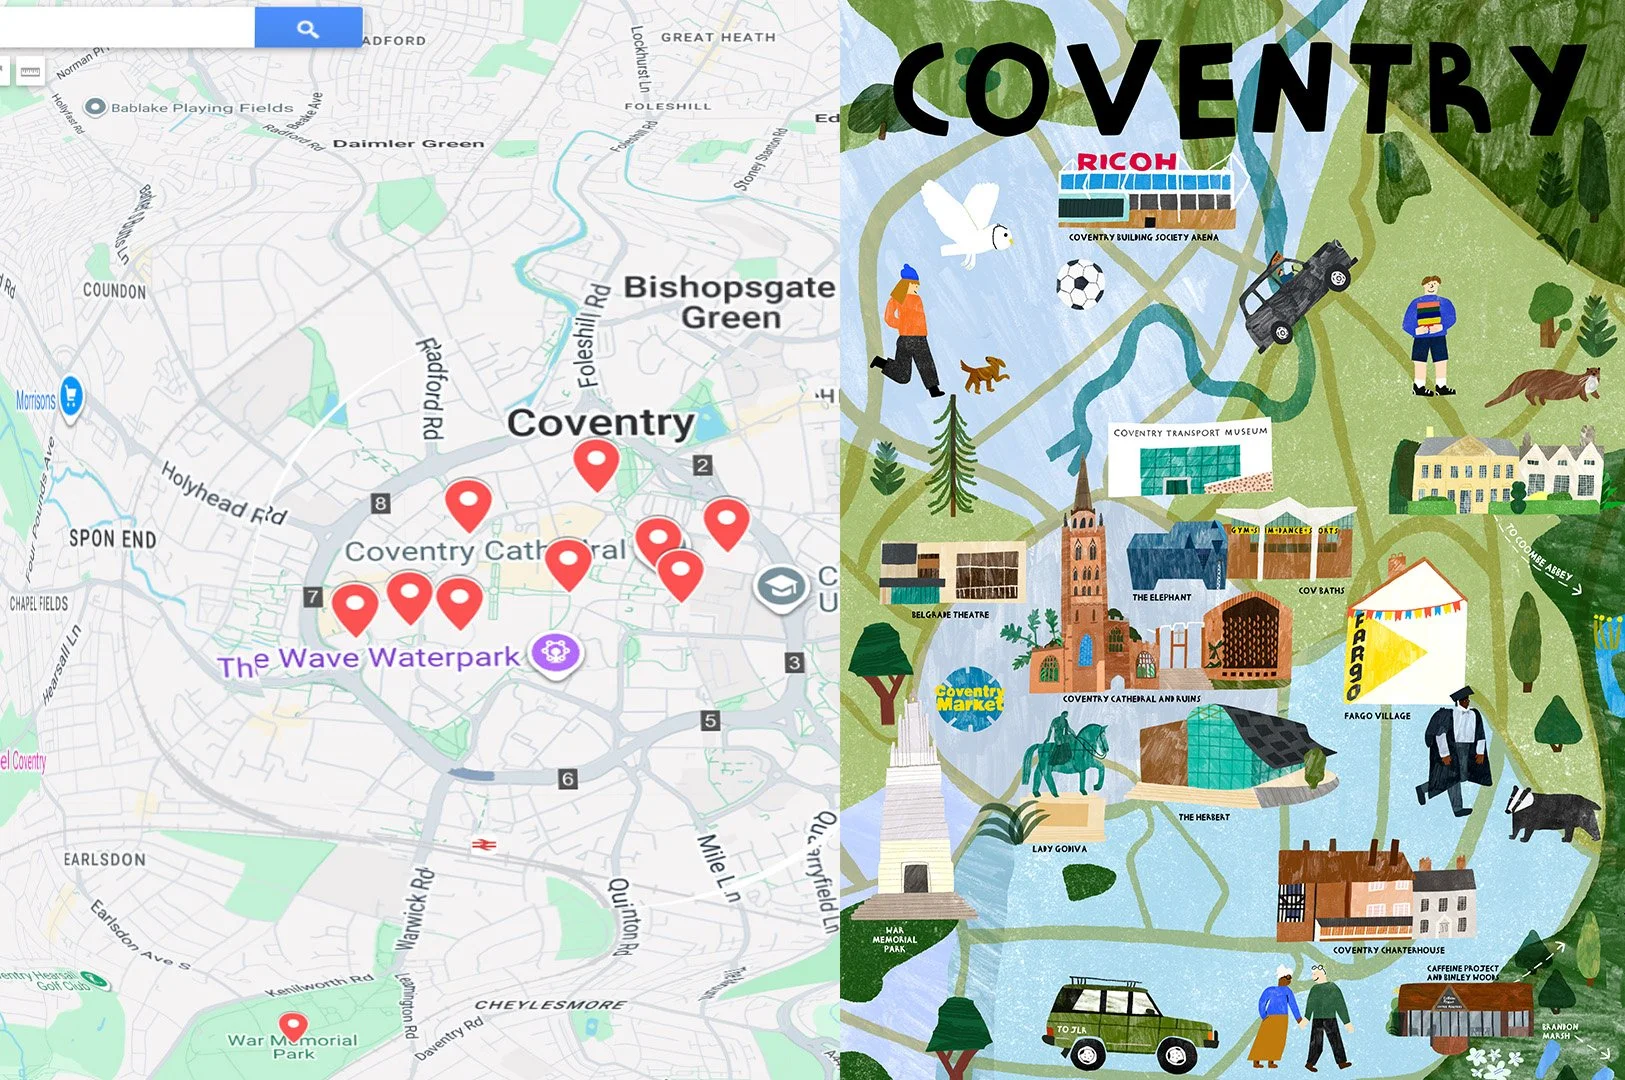
I usually work at twice the size of the intended finished map to maintain a high resolution. This also gives us a little more flexibility if you'd like to reuse individual illustrated buildings or icons at a larger size in the future, although very large-scale applications may need additional preparation.
If your organisation has an existing colour palette or brand guidelines, I can incorporate these into the design too.
Throughout the process, I'll share the artwork with you so you can see how it's developing and provide feedback. Two rounds of revisions are included, covering amendments within the agreed brief. We'll make sure we're happy with the overall direction before getting too far into the detailed illustration.
One thing I've learnt from creating illustrated maps is that they often don't look quite finished until the very last details are added.
I tend to leave things like wildlife, foliage and little characters until the end, and it's amazing how these finishing touches can suddenly bring the whole illustration to life. So don't worry if the work-in-progress map looks a little bare at first!
Once everything is approved, I'll prepare your finished artwork in the agreed format, ready for its next adventure.
6. How much does it cost to commission an illustrated map?
The cost of a bespoke illustrated map depends on a few different things, so the more information you can share with me at the beginning, the better!
As a guide, my illustrated map commissions range from £650 to £5,000+, depending on the size, complexity and intended use of the artwork.
A smaller map featuring just a handful of illustrated landmarks will naturally cost less than a detailed city map with dozens of buildings, roads and little details to discover.
The amount of research involved can also influence the price, particularly if we're working with historical material or need to adjust the geography to accommodate lots of locations.
If you're working with a particular budget, don't be afraid to let me know. There are often ways we can adapt a map to suit, perhaps by reducing the number of illustrated landmarks, simplifying the road network or choosing a less detailed approach.
The intended use of the illustration will also influence the quote. For example, a map created for a visitor leaflet might have different licensing requirements from one that's going to be printed onto merchandise or used across multiple locations.
My quotes typically include the initial planning and research, rough layout, finished illustration, two rounds of revisions and final agreed files. I ask for a 40% deposit to secure the commission, with the remaining balance payable according to the agreed terms.
And here's something else worth mentioning!
If you're interested in commissioning a map of a town or city that I could also sell as prints or gifts through my own shop, there may be an opportunity to share the costs of creating it.
I've worked this way before, and it can work well as you get the map you need and I get to add another location to my collection. This is something we can explore for suitable projects, with the usage rights agreed in advance.
Every project is different, so it's always worth getting in touch to discuss what's possible.
7. How long does it take to create an illustrated map?
The time it takes to create a bespoke illustrated map really depends on the size and complexity of the project.
Smaller, simpler maps can take around 1–2 weeks, including our initial meeting, research, illustration and two rounds of feedback.
More detailed illustrated maps typically take 5–6 weeks, allowing time for planning, an interim catch-up, revisions and potentially liaising with printers.
Sometimes the research can be one of the most time-consuming parts! I like to make sure I've got all the locations, buildings and little details right before getting stuck into the fun drawing part.
I also build my maps in a way that makes it relatively straightforward to edit individual elements as the design develops.
To help everything run smoothly, it's really useful if feedback can be gathered and sent over in one go, particularly when several people are involved in approving the artwork.
I'd recommend getting in touch at least 6–8 weeks before you need your finished map, or earlier if possible, especially if it's for an exhibition, publication or event.
Working to a tighter deadline? Do get in touch! Depending on my availability, I may be able to accommodate a quicker turnaround, with an additional rush fee.
8. What files and usage rights will you receive?
When your illustrated map is finished, I'll supply the artwork in the format we've agreed, whether that's a high-resolution PDF, JPEG or another file type.
It's really helpful to discuss this at our initial meeting. Will the map be printed or used digitally? Does your printer need CMYK artwork, or would an RGB file be more suitable?
If you're unsure, don't worry! I'm happy to liaise directly with your printer to make sure everything is set up correctly and ready to go.
If you'd like different versions of your map, perhaps one with labels and another without, or individual buildings supplied separately, that's absolutely possible too. Just let me know at the beginning so I can include any additional work in your quote.
Copyright and usage rights are another thing we'll agree on before starting.
I normally retain copyright of my illustrations and provide a licence for you to use the finished map in the ways we've discussed.
For most commissions, we can agree a one-off licensing fee covering the intended uses. This can include permission to use the artwork indefinitely for specific agreed purposes.
If you'd like to use your map on merchandise, across additional publications or in other formats later on, we can discuss extending the licence. For some merchandise projects, an ongoing royalty arrangement might be more suitable.
The standard deliverables are finished artwork files rather than my original editable working files. If you need layered artwork or additional adaptations, we can discuss those separately.
The main thing is that you'll know exactly what you're receiving and how you can use your map before we get started!
9. What should you include in an illustrated map brief?
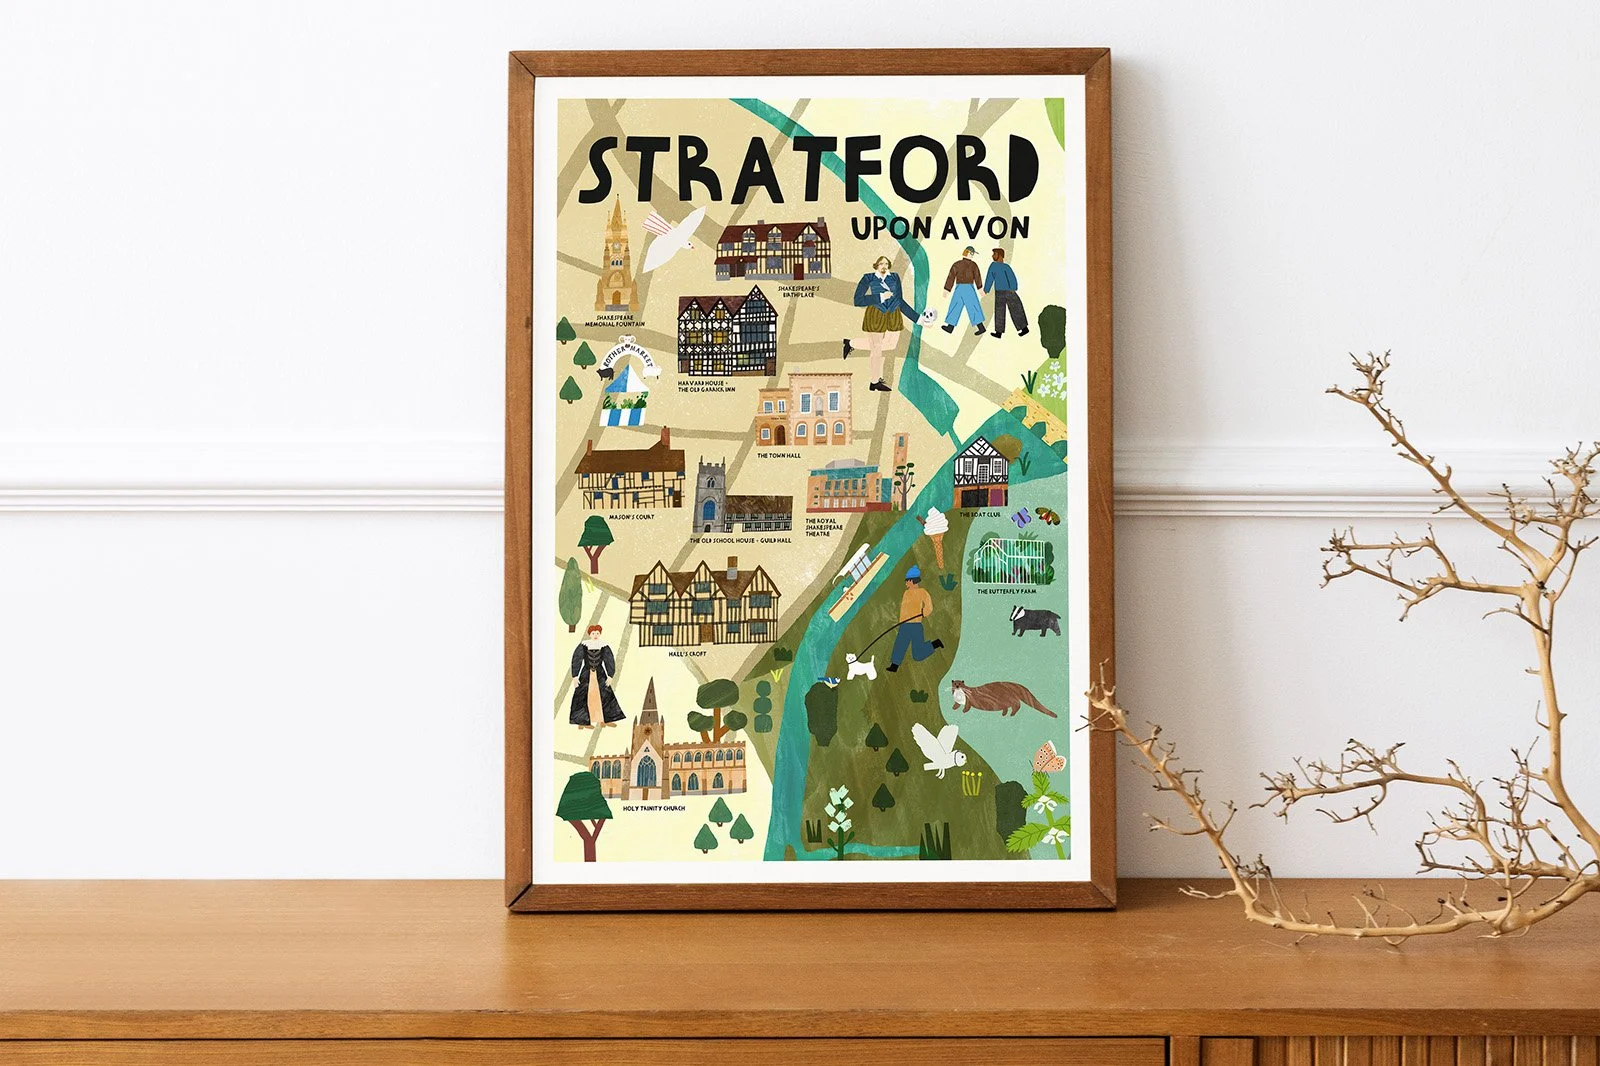
Ready to commission your own illustrated map? The more information you can share with me at the beginning, the better!
It helps me understand what you're imagining, put together an accurate quote and get your project off to a good start.
Here are a few useful things to think about when putting together your illustrated map brief:
The area you'd like illustrated: A Google Maps link, screenshot or even a roughly drawn boundary is a brilliant starting point.
Your must-have landmarks: Which buildings, locations, roads, pathways or local stories would you love to include?
Who the map is for: Will it be used by visitors, students, children, local residents or another audience?
How the map will be used: Perhaps it's for a printed visitor guide, website, exhibition, mural or merchandise.
The finished size and format: Do you need an A3 or A4 map, a particular orientation or something a little more unusual?
Style and colour preferences: If you've got brand colours, logos, existing maps or examples of illustrations you like, I'd love to see them.
Your budget: Even an approximate budget is helpful, as it allows me to suggest what's possible within your price range.
Your deadline: Let me know if you're working towards an exhibition opening, publication date or print deadline.
Reference material: Photographs, historical maps, sketches, useful links and any text you'd like included are all welcome.
Who will approve the artwork: If several people or departments need to sign off the map, it's useful to establish this early on.
And please don't worry if you haven't got all these things figured out! You don't need a perfectly polished brief to get in touch.
I'm always happy to arrange a call or meet for a coffee so we can talk through your ideas, have a doodle and start imagining what your illustrated map might look like together.
Want a little help getting started? Download my free illustrated map brief checklist to gather your ideas, locations and inspiration before getting in touch.
10. Ready to commission your own illustrated map?
I hope this guide has given you a little inspiration for what your own illustrated map could look like!
Whether you're a museum hoping to bring local history to life, a university looking for a more engaging campus map, or a business wanting to celebrate a much-loved place, I'd love to help.
My favourite thing about creating bespoke illustrated maps is discovering what makes each place special. I love exploring local history, finding little connections to nature and adding playful details that make people look twice. Every map is different, and that's what makes them so much fun to create!
You can explore more examples of my work in my illustrated maps portfolio, or get in touch to chat about your ideas. It doesn't matter if you've got a fully formed brief or just the beginnings of an idea.
I can't wait to hear about your next map project!